
Hello again, my lovely friend! Today I’m sharing this console table makeover that already sold – I think I paid about $20 for it at a yard sale. Seriously, who could resist those legs??

I don’t know how I always end up with these pieces with ink stained drawers… even with primer, the ink often peeks through! The best solution for that is to cover it up with pretty paper (which you’ll see a little further down).

* This post contains some affiliate links so you can easily find the products I use and recommend. Learn about all my favorite DIY products and tools Here.
The cherry wood table was primed with two coats of my favorite primer. Then I decided to change the pulls to a single knob, so I filled the original holes with wood filler and marked a new spot in the center.
(Normally you’d want to fill and drill holes before starting to paint, but sometimes I do things a little out of order… Lol)

I drilled the new holes, painted two coats of Annie Sloan Chalk Paint in Pure White, and lightly distressed around the edges. Then I protected it with clear wax and finally tackled the drawer problem.
Tip: Use a paper cutter (like mine, Here) for perfectly straight lines on small drawers like these and then matte Mod Podge to glue it down.

Discover more DIY drawer liner ideas here.
The final touch on this console table makeover was new knobs from Hobby Lobby. These add a modern, stylish touch.

Here’s a top view of those decoupage drawers…

Such a change from how it first looked when I got it!

And it’s such a sweet piece for an entry way, hallway, or any little nook where you need some extra table space.

Here’s a handy before-after graphic of this console table makeover for you:

Let me know what you think of this console table makeover in a comment below – also please pin or share this project with a friend so others can be inspired too. Thank you, I appreciate you! -Jen
I know many of you are already running (or starting) your own furniture makeover business, and I get a lot of questions about pricing and profit. This table I purchased for about $20, used a little primer, paint, and wax, and already had the paper – so very minimal supply costs. I priced it at $135 and it ended up selling from my booth at 20% discount for a total price of $108. To learn more about pricing refinished furniture for sale with more examples, read This Post.

Now it’s time for more furniture makeovers from my blogging friends. Below are their Before photos – visit the links underneath to see the Afters and learn how they did it:
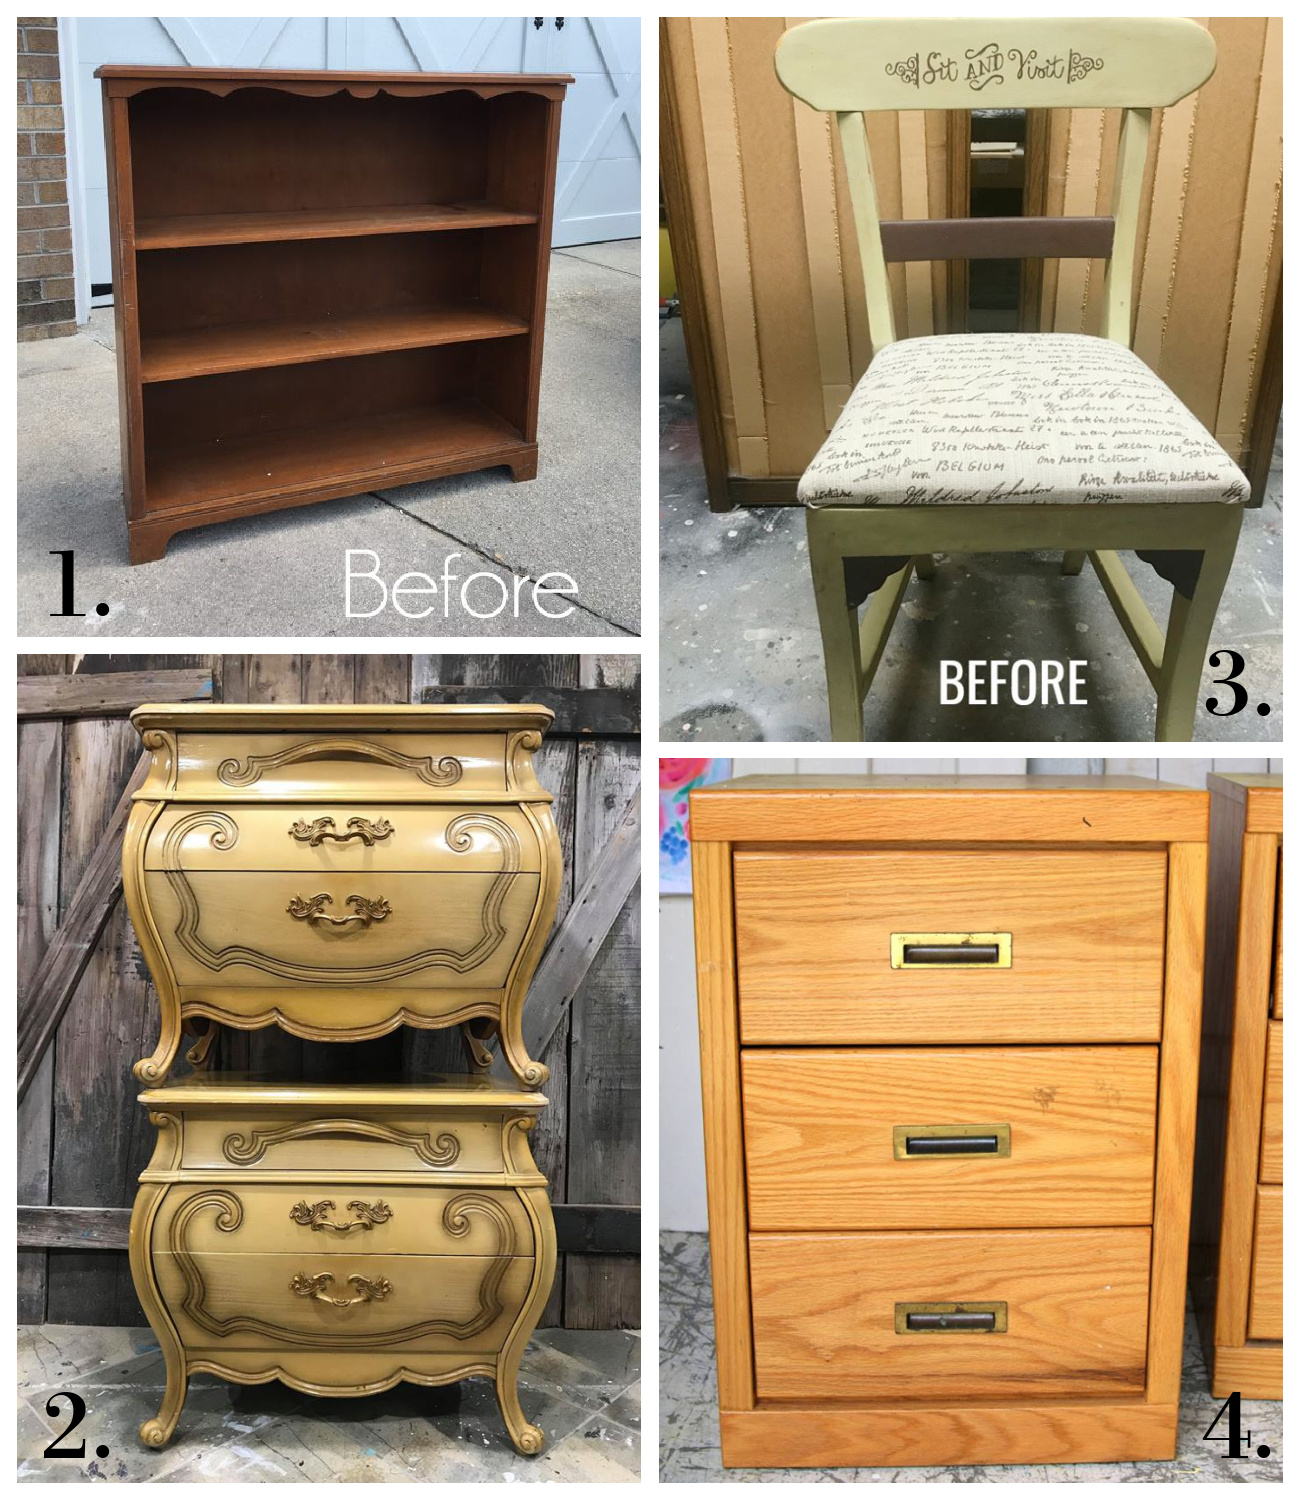 1. Confessions of a Serial DIYer
2. Just the Woods
3. The Interior Frugalista
4. Petticoat Junktion


Larissa says
Sweet score and wonderful refreshed new look. So pretty!
Marie Blackburn says
So pretty painted white and I’m swooning over those pretty knobs! Oh how I wish we had Hobby Lobby in Canada ?
Sharon Graves says
I need help. I recently got my mom’s Lane cedar chest. I want to restore it not paint it but I have no idea how to start. I have not been able to find someone in our area that has experience with this and I want to be careful with it. Any advice on how to do this?
Kandice says
This little table is adorable love the paper. And congrats on the book!!!
Jen, Girl in the Garage says
Hi Sharon, send me a couple photos to [email protected] and I’ll see if I can help 🙂
Jen, Girl in the Garage says
Thank you Marie! I don’t know what I’d do without Hobby Lobby! 🙁 (and now even my sons are getting addicted to it, Lol)
Jen, Girl in the Garage says
Thanks Larissa! xo
Jen, Girl in the Garage says
Thanks so much Kandice! xo
Andrea says
Ooh, ooh, I wanna see you do a cedar chest also! I have my grandmother’s chest that is cherry but needs some TLC, so some ideas would be appreciated!
Jerri says
This doesn’t look like the same table. The white brightens and modernizes it. Did you sand the table before painting it? I know this is for a client, but otherwise how do you decide what color paint to use? Beautiful transformation? Thanks for sharing.
Catherine says
Very nicely done! I love those little knobs. They add just the perfect touch!
Lizzy says
So cute, so modernized. It’s nice to see others using ASCP in Pure White. I love it.
(I won’t set foot in Hobby Lobby, though!)
Jen, Girl in the Garage says
Thanks so much, Catherine! 🙂
Jen, Girl in the Garage says
Thanks Jerri! I did not sand the table first, since the finish was already smooth and because I used the primer which helps give the paint something to hold onto.
Jen, Girl in the Garage says
Oops, almost forgot your other question – I tend to do mostly neutral pieces that could work in most people’s homes. I sometimes do blues or otherwise save pops of color for inside drawers. Hope that helps!
Jen, Girl in the Garage says
Thanks Lizzy! I get most all of my knobs from Hobby Lobby when they’re 50% off, otherwise I’d be paying more for knobs elsewhere and for shipping probably. 🙂
Jen, Girl in the Garage says
Hi Andrea, I’ve done a couple cedar chests where I’ve painted the outside but left the inside alone because it was in good shape. Here they are if you want to take a look: https://girlinthegarage.net/2017/08/lane-chest-makeover-goodwill-story and https://girlinthegarage.net/2017/11/cedar-chest-makeover-without-bleed-through Hope that helps 🙂