
This is the type of inexpensive thingamajig you just can’t pass up at the thrift store… a little wooden storage box with so many different ways to be updated – which is why it took me months to decide what type of box makeover to do. haha

I was pretty sure I was going to paint it, distress it, and then add an image transfer like I did with this tea box makeover. I love that look, but I’ve done it a few times before and felt like doing a more colorful project for Trash to Treasure Tuesday (see my blogging friends’ thrifty makeovers at the end of this post).
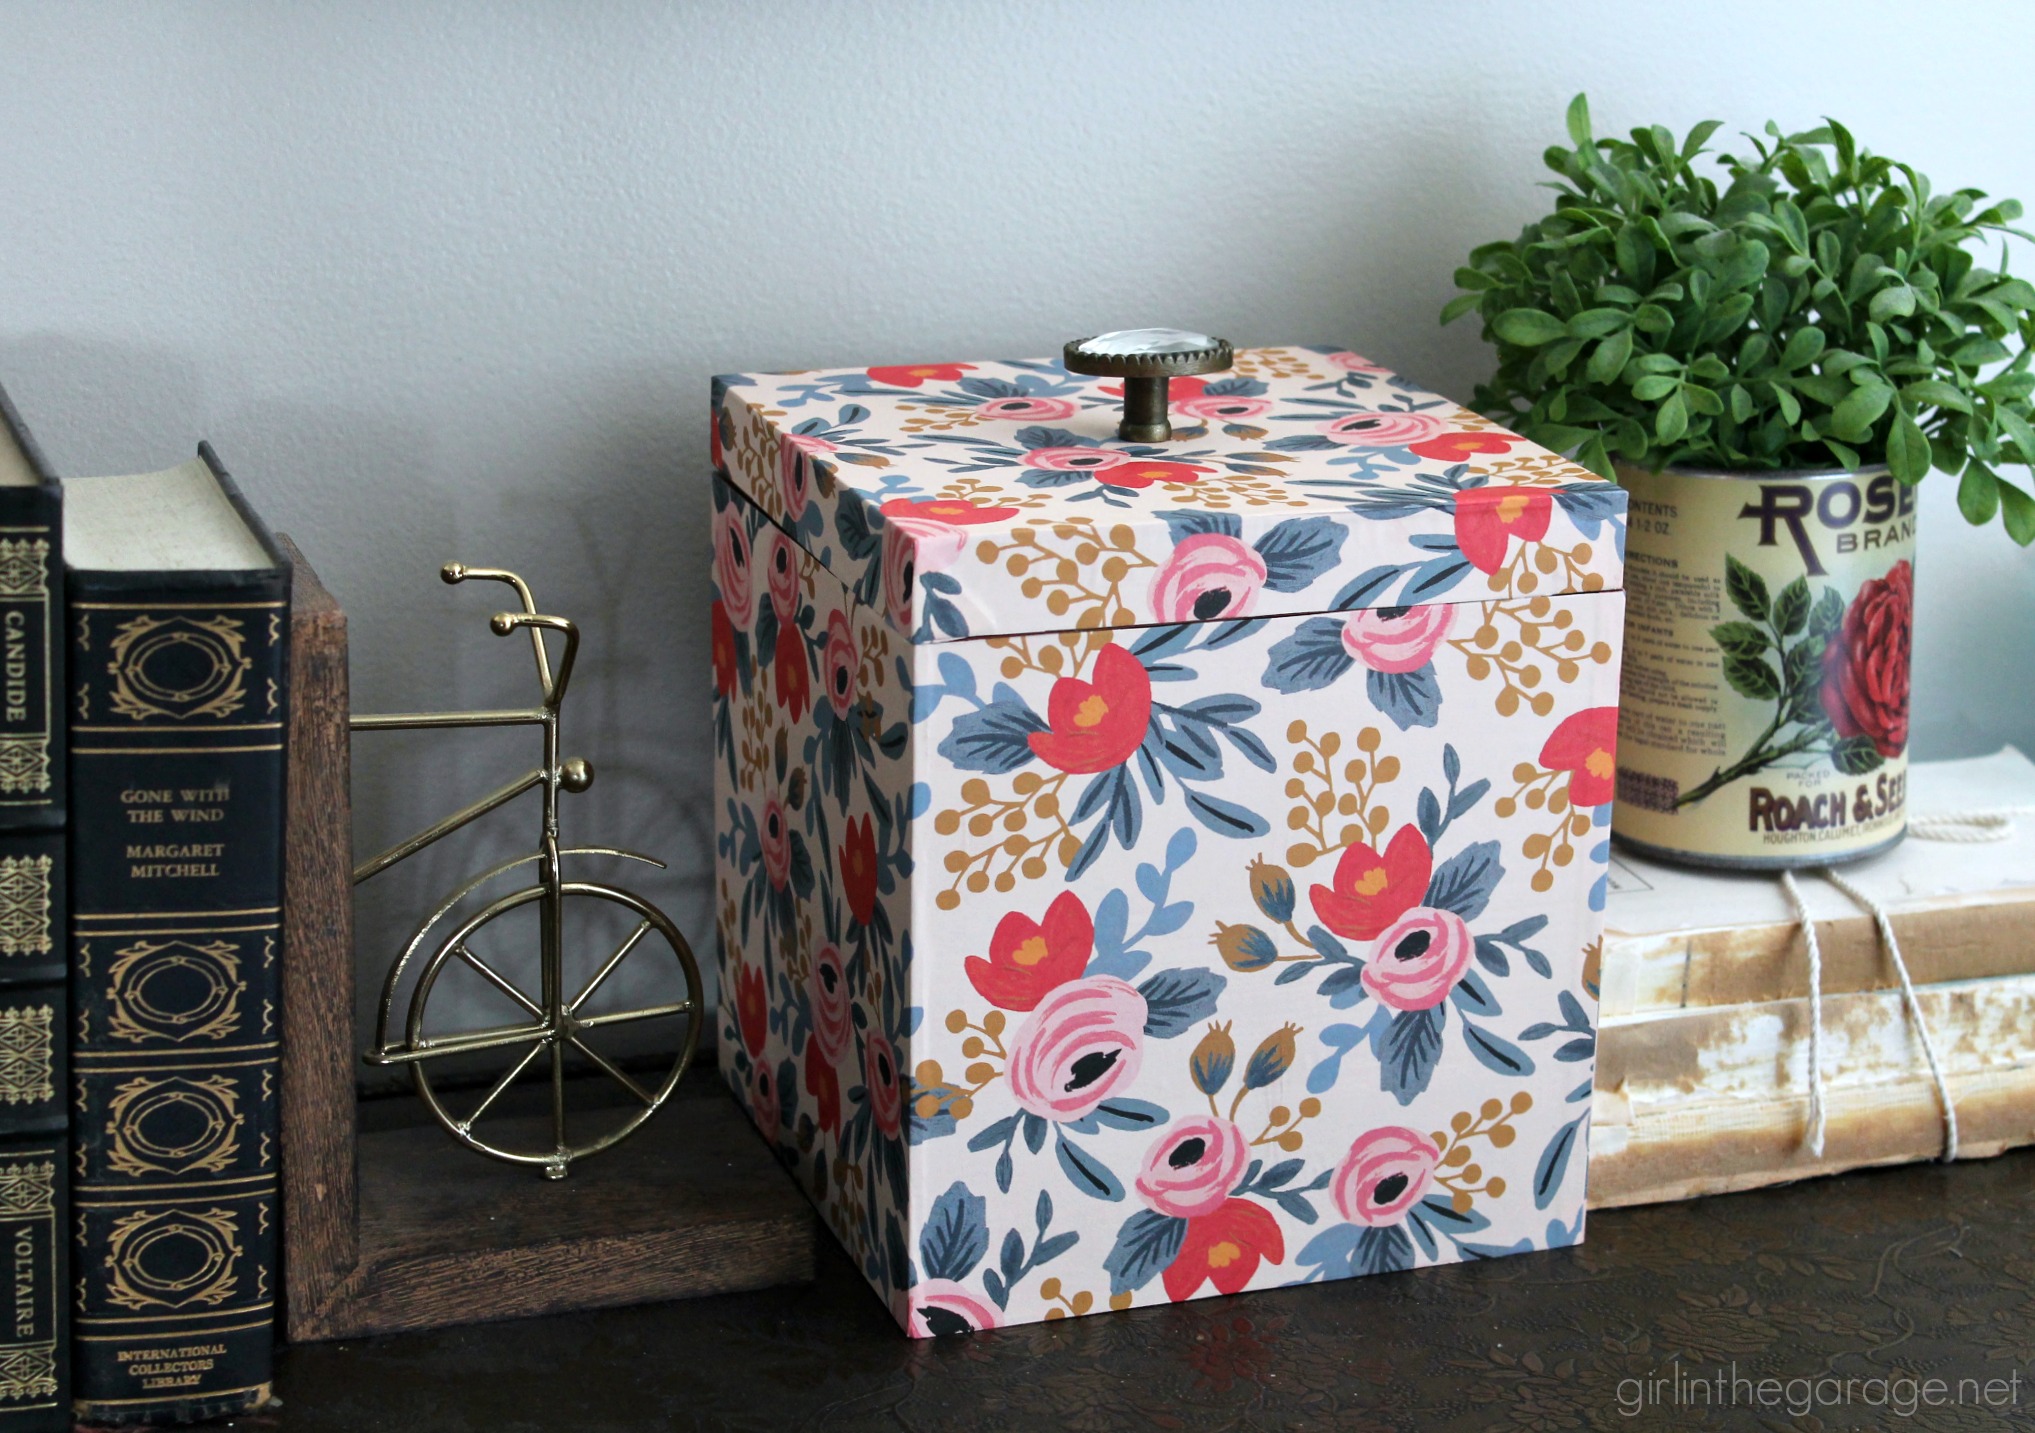
Then I remembered I had a few rolls of Rifle Paper Co. wrapping paper just gathering dust. Their designs are gorgeous – I’ve been using their wall calendars for a few years and also have some of their fabric. I used another Rifle Paper Co. wrapping paper for this desk makeover last year.

This paper is great to work with because it’s not as thin as some wrapping paper, but it’s also a little pricier so you don’t want to make mistakes when cutting. Thankfully I only needed one sheet to decoupage the four sides and the lid of the box.
I measured and cut two big rectangles; each one would cover two sides of the box.

I used a sponge brush to apply matte Mod Podge all over one side at a time.

The first paper section was cut a little long so it would fold over each end. Work on one side at a time and keep smoothing out the paper to avoid any air bubbles. I just press with my hands. Do this for 4-5 minutes for each side before moving on.

The second section didn’t fold over, it came just barely short of the corner. (I overlapped the paper so none of the brown box would show through if my cutting/gluing wasn’t perfectly straight.)

I cut extra all around the sides of the lid because I’d have to fold each side down.

Before gluing onto the lid, I folded and creased the paper to get the proper fit. Then I glued and smoothed it out just like the sides, trimming any wonky edges after it was dry.

The plain box looked so pretty in the Rifle Paper Co. wrapping paper! But it needed just a little something else…
So I used my favorite super glue E6000 to glue a bling-y drawer pull on top for easier lid lifting. (I wasn’t sure that the thin lid could handle a power drill, that’s why I went the glue route.)

Ta da…


I was thinking of selling this wrapping paper box makeover, but I might have to keep it! I love the colors in the paper and can always use more storage places in my home. 🙂
Here’s a peek with the lid moved:

Here’s a before and after again, if you forgot how plain and boring the box was:

P.S. This is not a sponsored post for Rifle Paper Co. I’m just a big fan of their products!
Now it’s time for Trash to Treasure Tuesday with my creative friends:

Below are the Before photos – click the links underneath to see the Afters and to learn how they did it.

1. Artsy Chicks Rule
2. Prodigal Pieces
3. Confessions of a Serial DIYer
4. Bless’er House


Larissa ~ Prodigal Pieces says
Love this! It’s like opening a present every day. Yay!
Nancy @ Artsy Chicks Rule says
That turned out so pretty Jen!! I love it! xo
Jen says
Haha, yep! That’s another reason why I added the knob on top- didn’t want it to confuse anyone who might think it was a gift. LOL!
Jen says
Thanks so much, Nancy! I’m glad I finally used some of that pretty paper!
MaryJean says
What a cute box! I love it!
DIY Home Sweet Home says
LOVE the paper you used. What a great idea.
Dawn says
Love it! I actually did this to a great hinged top box I had, many moons ago, and made a greeting card file out of it. Still have it, and use it and we’re talking 20+ years ago!