
You guys. Remember how I told you last week about my recent little Goodwill shopping spree when I shared the $6 vintage vanity bench that I redid?
Well this big beautiful beast was the big score that day – only $36 on sale!

Sure it had chips and scratches, a few of the feet had big chunks missing, four of the curved trim pieces on the doors were missing (one was hiding in a drawer though), and it had a whole lotta sadness going on. But it’s super heavy and solid for being only about 6 feet tall. Oh and the back was stamped 6/21/48.
*Guys, today is Furniture Fixer Uppers day with my furniture makeover friends – so be sure to stick around and visit their projects at the bottom of this post. Also, this post contains some affiliate links so you can easily find the products I use and recommend. Discover my favorite brands and tools for doing DIY makeovers here.
First up, I removed the back panel – I wasn’t sure how I was going to update it yet, but it’s much easier to paint inside without that in the way. Then I taped the glass on both the front and back sides.

Next, since that reddish mahogany finish always bleeds, I primed it with my favorite shellac primer.
Soon I was walking through Home Depot trying to get ideas for the back of this china cabinet makeover. Then I saw something….. Shiplap! Did you know you can buy primed boards of it there? I know it’s been really popular on walls for a farmhouse look thanks to Fixer Upper but I can’t say that I’ve ever seen it used on furniture before.

Love this! – Sign available from Slapstick Signs on Etsy (click here)
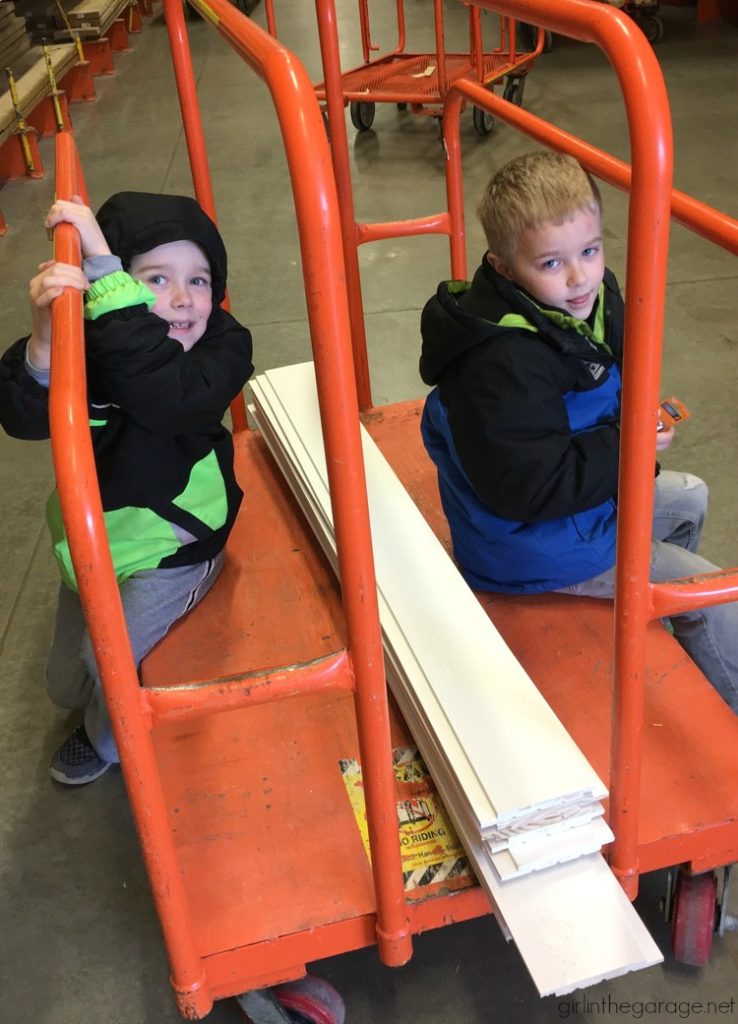
My two older boys were with me since I had just picked them up from school. They weren’t amused at how long I was taking in the store, but they liked sitting on the cart!
How to add shiplap to furniture
One primed 8ft. shiplap board is about $5, and I ended up using four of them. I had the store cut them in half for me, and then my husband (Guy in the Garage) cut them a little shorter to the exact length needed.
By this point I had also painted the china cabinet in its first layer of paint – Annie Sloan Chalk Paint in Country Grey.

Shiplap has little grooves at the top and bottom that make the boards really easy to interlock with each other. I hammered a couple one-inch nails at each end and then they were secure. So simple.

Here’s another behind the scenes photo (no judging, you know I’m not perfect by any means!) – the boards are all in place and the next layer of paint is on – Annie Sloan Chalk Paint in Old White.
It was pretty as-is but this was going to be a rustic, farmhouse china cabinet makeover. (Imperfections for the win.) Funny story – I sent the above photo to my mom and sister to show them my progress and my mom replied “What’s shiplap?” haha. She doesn’t watch much TV. 🙂
Next came lots of sanding and mess everywhere. This cabinet got my favorite type of treatment – layered neutral paint colors with some distressing to bring out the lovely details.

That shiplap – oh my word, it’s so pretty! I’m not the type to commit to something like that on my walls because I’d probably change my mind after a few months, but I absolutely love it on this cabinet.


The layers of Country Grey and Old White are such a nice contrast against the wood finish peeking through, don’t you think? Swoon.

The drawer pulls are all original but the door pulls were in rough shape – so it got some new bling from Hobby Lobby.

There are two big areas for storage behind the bottom doors.

The drawers were actually in good condition so I left the wood alone. Again, the contrast looks good here.

I forgot to mentioned that it was sealed with Annie Sloan’s clear wax for protection.

Discover more Farmhouse Decorating Ideas on a Budget here, and also Farmhouse Decor on a Budget here.
Below is another look at the before and after of this china cabinet makeover (which you can Pin to easily find again later):

I’d really truly love to know what you think! Also – if you’d take a moment to Pin this post or share it with a friend, I’d be so thankful!
Next it’s time for Furniture Fixer Uppers day with some of my favorite blogging friends:
You can see all my past Furniture Fixer Upper posts right Here.
Below are the Before photos – visit the links underneath to see the After and to learn how they did it.
 1. Confessions of a Serial DIYer
2. Just the Woods
3. Petticoat Junktion
Next week I’ll be sharing how I updated this thrifted piece (Update: See this bookcase makeover HERE)…


Debra Wise says
Great makeover! Love the shiplap!!
Lena says
I love the shiplap. It completely changed the look of this “traditional” style piece. I’ll have to remember that the next time I do a hutch like this one.
Christy@Confessions of Serial Do-it-Yourselfer says
I LOVE the shiplap! It is so unexpected for this formal piece and I love the combination. I had some leftover boards from the board and batten I did in the boys’ bathroom and I was going to add it like shiplap to the back of hanging shelf I did last week, but opted for fabric instead. Kinda wish I’d have gone with this look! XO
Jen, Girl in the Garage says
Thanks so much, Debra!
Jen, Girl in the Garage says
Thanks Lena! It was easier than I thought – I’ll definitely use it again sometime. 🙂
Christy@Confessions of Serial Do-it-Yourselfer says
Forgot to mention…$36??!! Score!! 😀
kandice says
this is so pretty! love the shiplap! our kids also like to ride around on the orange trolly thing too lol
carolyn says
I’m curious to know why you didn’t just remove all the trim on the doors since some of it was missing?
Jen, Girl in the Garage says
That’s a good question. I usually prefer to embrace the imperfections in an antique if it’s related to special trim work or an important part of the character. Sometimes I see people remove the uniqueness of a special antique piece because there are minor issues, and when they’re all done it almost looks like a modern mass-produced piece of furniture. Much of the charm is gone. It’s just my personal preference, and I might not always do it – it depends on the piece.
Jen, Girl in the Garage says
Haha! I’m sure I’d love it too! Looks fun 🙂
Jen, Girl in the Garage says
Yes, girl – an awesome score but this thing is SO heavy! I’m kind of dreading taking it to my booth, haha. I definitely see more ship projects in my future. 🙂
Jessica says
Is that primer you put on it first?
Anonymous says
So how DID you replace the missing curved pieces on the door trim. You don’t tell us that…
Jen, Girl in the Garage says
Yep! It’s my favorite shellac primer. I talk about it more in the post (right after I removed the back and taped the glass). There’s also a link to it above. 🙂
Jen, Girl in the Garage says
I didn’t replace the missing pieces. If you look at the close-up photos, each door still has two missing pieces of curved trim. There are little raised lines where the trim used to be (from the old glue maybe), so when I painted it and then distressed over the lines, you almost can’t tell that they’re missing from far away. Hope that makes sense. 🙂
Jen, Girl in the Garage says
Correction – I did find one piece of trim in a drawer, so there are still three missing pieces total. (One on the left door and two on the right)
Laura F says
Love the shiplap! I have a similar cabinet that I was going to do beadboard on the back of….plans now changing! The shiplap is a modern yet just traditional enough touch that updates your piece well….Great Job!
Tracie says
How ironic, I just purchased a corner hutch that matches it to a “T”!!!!
Marcie Lovett says
That was a fun idea! I didn’t realize shiplap was an actual product you could buy, I thought it was just wood strips. I love the shape of the cabinet – my favorite furniture era.
Jen, Girl in the Garage says
Oh, awesome! 🙂
Jen, Girl in the Garage says
Haha! I was thinking of doing beadboard on this one at first – I love it too!
Marie-The Interior Frugalista says
Did you say $36 – nice score! Seeing your boys on the cart reminded me of when mine were little, they loved riding on those. I’ve been contemplating using shiplap on the back of a cabinet I’m redoing and seeing yours convinced me that’s the way to go. Love the makeover, Jen!
Naomi S. says
I like the shiplap on the back of the cabinet, Jen. That was inspired. It looks very “country”. The only thing I don’t like is the pulls on the drawers. They are definitely not “country” to me and distract from that look on the rest of the cabinet. I would use something more primitive–maybe a cupped pull in metal. And some plain knobs in the same metal for the doors. Then it would really look more in keeping with the shiplap. How does that strike you? You realize, of course, that is just one person’s opinion and not intended to be critical of your work at all.
Lizzy Leff says
Love it! Great job. I just did my dining room in shiplap, and I have extra. Thanks for the inspiration!
Jen, Girl in the Garage says
Ooh, awesome! I bet it looks amazing!
Jen, Girl in the Garage says
Naomi- Cup pulls didn’t even cross my mind, but you’re right that style would be perfect for this piece. Thanks for the suggestion. I’ll remember that next time I do a similar project. For now I’ll keep these and try to sell it as-is. 🙂
Jen, Girl in the Garage says
Awesome Marie, I can’t wait to see how it turns out! 🙂
MaryJean says
I really love the shiplap! I thought it would not be noticeable with the doors closed, but it looks great! Nice job, Jen.
PC says
I have the same cabinet in pristine condition from my grandmother. I love how this one looks
Jamie Perez says
I love it!! I have a Buffett that is similar just waiting for a makeover! I know now that I will definitely use primer (so thank you!) and my piece is also missing a few chunks around the feet. Should I fill them in…or just paint and call it “the well loved” look!!!?!?
Jen, Girl in the Garage says
Thanks so much! If it’s a piece that you’re keeping, I wouldn’t worry about fixing the feet unless it really bothers you, or if it would be an easy fix.
Vivian says
I have a cabinet that is similar in style and design and have been thinking of painting it. How much chalk paint did your project take? And how long did it take? Everything I’m reading about chalk paint makes me think it is a quick drying product making projects faster (maybe) than using normal paint. Any tips or specifics you can give?
Jen, Girl in the Garage says
Hi Vivian. I used about a half can of Chalk Paint, that’s after priming it first with the Zinsser BIN shellac. I’ve done lots of projects with Annie Sloan Chalk Paint, it’s my favorite type of furniture paint. It does dry pretty quickly- if I’m doing a big piece, once I get a coat of paint on then I can usually go back to where I started and start doing the second coat right away. Of course if you’re outside on a hot day (like it’s been here lately) then it will dry even faster. The china cabinet took a couple days, I have three little kids so I have to take a lot of breaks. 🙂
Kimberly says
Did you paint your shiplap once you secured it to the hutch? Or just leave it primed and it blended that well?
Jen, Girl in the Garage says
Hi Kimberly, yes I painted the shiplap so it would be the same color as the rest of the cabinet. Hope that helps!
Shelley says
I am new to your site and have just subscribed.
I love this hutch. I’m going to make a couple of comments but I’ve seen them in the others, so I’m just repeating 🙂 I think I would have thought about using bead board but I love the shiplap so much more! Great choice!
I also would have used new pulls, or at least painted & distressed the old (original) ones. I think the ones there presently stand out too much when you look at the piece. Softer colored ones, or even old fashion glass knobs, I think we would have been better.
And lastly, have you ever thought of just leaving off the glass doors on the top of a china cabinet? I imagine the purpose of the doors is to protect the China that used to be kept in it – – But nowadays if it’s used for display of different objects, flowers etc., I wonder if the doors are not necessary, And you could see the insides and shiplap even better.
Lots of comments, but let me say again I love this piece. That’s why I studied it so 🙂
Jen, Girl in the Garage says
Thank you, Shelley! I appreciate you sharing your opinion. It’s all a matter of personal preference. My goal is to inspire people with new or different ideas, and then you’re free to run with it and put your own personal touches on it. (I personally don’t remove glass doors from cabinets, I think they’re part of the original charm – but again, just my preference.) Happy Holidays to you!
Lisa says
Hello. I have a very similar cabinet that I am refinishing. I am concerned about removing the shelving from the top of hutch an afraid I may damage the walls. Did you have any trouble with doing that ? Thanks for the inspiration… I have a buffet, table 6 chairs and the hutch on my to do list this summer !
Lisa
Jen, Girl in the Garage says
Hi Lisa! That sounds like a big to do list, good luck! 🙂 The shelves in my hutch were removable, so I didn’t have any problems with them. If your shelves are secure I’d try to leave them and work around them as best as possible.