

Hi there, I’m Amy from Highstyle Restyle and I’m excited to be a guest here at Girl in the Garage. I’m a furniture lover and spend my time giving the unwanted and unloved furniture CPR. I’ll Craft it, Paint it, Restyle it until it’s good as new or even better.
Do you own a piece of furniture you can’t bring yourself to tackle yet because of its battle scars? If you thought you couldn’t repair deep scratches, gouges or teeth marks, I can show you how to fix them like a boss.

Then let me introduce you to one of my favorite furniture CPR products.

My go-to product and secret weapon is Durham’s Rock Hard Putty (available at most hardware stores) when it comes to repairing furniture. In most cases, one of these cans should last a lifetime but I’ve gone through one in about a year. I use it that much and trust me, it’s that good.
If you’ve been hoarding, I mean saving, that piece of furniture because you thought it was a lost cause, it can be fixed at last. You are so gonna thank me for sharing. 🙂
First step is mixing up the desired amount of Durham’s putty with a little water. I use a disposable cup or bowl and gradually add water until it gets to a workable consistency. You want it similar to a creamy peanut butter.
Using a putty knife, smear the Durham’s over the area you want to repair, pushing the putty down into the scratches or chew marks. Then, take a damp paper towel and wipe off any excess. Once you’ve applied as much as necessary to fill any scratches or holes, let dry at least two hours before moving on.

When the puttied areas are nice and dry, it’s time to sand off the excess. 120-grit does a nice job removing the extra putty without sanding too much of the surrounding wood.
Make sure to sand the entire area you’ve filled with putty until the finish is smooth to the touch. The putty should completely cover and fill in all the damaged areas without creating extra build-up.
Durham’s helps save those pieces that might have been forgotten about otherwise. It dries rock-hard just like its name so you never have to worry about it crumbling. I’ve even molded missing corners and trim pieces with this putty!
Now, that you’ve learned how to fill those scratches and other unsightly marks, you can move on to the fun part of painting and restyling!

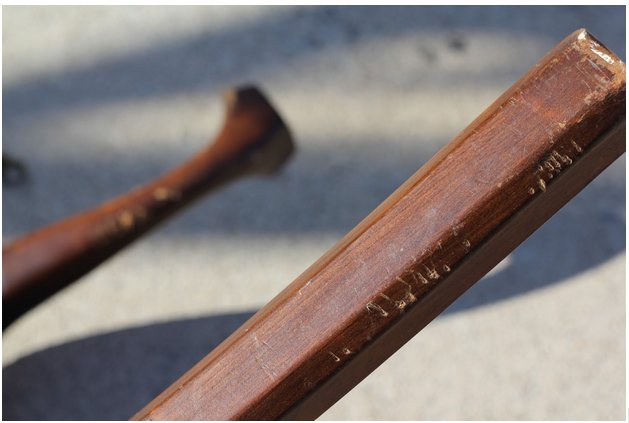
Can you believe this is the same chair leg? This came from a set of solid cherry chairs that was being tossed by the owner because they thought they were unsalvageable. If they could only see them now!
If you decide to give my favorite CPR product a go, I hope you’ll stop by to see me at http://www.highstylerestyle.com and share your stories with me.
If you found my tutorial helpful, I hope you’ll share and pin away! To stay updated on my tips, techniques and latest Furniture CPR projects, you can follow me on Facebook too.
Amy


Rita F. says
Would wood filler or spackle work the same way?
Carol Paulus-Kalis says
I do have a piece of furniture I would like to try that on. It is a dry sink from when I was in my when I was in my country phase. I took the sides off of the top of it and the top is now scarred. I am definitely going to try that. Thanks for the tutorial.
Carol P-K
Lisa says
I have a dresser foot that needs to be repaired. Do you have a suggestion for molding the repair? The other foot is completely intact. It’s only the front of the curved foot that is missing. It looks like it broke it the original joint. Thanks!
Jen says
If it’s a smooth surface you might be able to use thin layers of wood filler to build it up (and then sand it smooth) – there are stainable options if you’re planning to stain it, otherwise you can easily paint over it. I had a desk drawer where a corner chunk had broken off and I used wood filler to kind of rebuild it. You can read about it here: https://girlinthegarage.net/2013/05/vintage-desk-makeover/ I hope that helps!
Lisa says
Thanks Jen! I’m gonna give it a try. What’s the worst that could happen, right? 🙂